Tuesday, 22 March 2016

Sci Fi ships


Brief: Design and produce for the next two weeks wither a transport ship or fighter craft within the next 100 years with reliability.

To develop my ideas I developed two Mood Boards one for modern and past vehicles another one from film and TV of Sci Fi vehicles.


To get influenced with an artists work I chose to use of Ralph Mcquarrie who's work on the original Star Wars films influenced generations of audiences as well concept artists.


I designed some vehicles in mind of different environments similar to what Mcquarrie has done for his work on Star Wars.

My Designs:
As you can see I went into this project in mind of different shapes and sizes and function from transport vehicle of war to a mini sub and space adventure creating aerodynamic and non-aero dynamic shapes.
I painted the designs to form the ideas of how they would look like for when I choose one to texture over and I can change it later if need.

The next stage was to model the design I chosen to develop further in 3D where I would produce a couple of renders that exhibiting some harsh lighting to make the ship a lot more exquisite.


I chose a render as of the same angle of the design I chose because it was easy to develop using quick painting, I wanted to use different shades of grey to develop a old looking ship design as I thought being in space would take its toll on the craft.


Overall I did enjoy the developed this mini project as I liked the designs I put in but when choosing the one design I really had to think about it as I know that I'm not the best at 3D modeling so choosing the right design was important. the painting part was not so bad as I use the same techniques that I use when painting the concept designs.


Saturday, 19 March 2016

Speed Painting


We were given another speed painting task to complete in the lesson and after. We started  with a small blurred out image where we had to paint the basic shapes we see and try to create an accurate portrait of the character. After the first 20 minutes we were given the full detailed image where we could see our mistakes and correct them and to add the details needed.


Friday, 11 March 2016

Constuction Vehicle designs.


We had to develop designs using circles and another using sharp angles in a quick motions allowing the designs to have more motion within the designs. In the end ill need to get in the right frame of mind allowing me to develop quicker motions and not rub amount as much, which I need to correct.


Here are some quick studies:


Monday, 7 March 2016

Trees.


We have been given the task of developing a tree with character that conveys the environment and atmosphere around it.
To start off the project I looked into trees that have unusual environments in the real world and how that can changes the way we see it. This is where I got interested into studying the different environments in which I could put my creation in.


I really like the idea of a tree on a cliff face due to producing a sort of loneliness and survival so I came up with some ideas that could link into this and some that could bring out a story within its self.
I also started to study the shape of tree in which could tell a story on its own so I looked in to films and TV shows where a tree is a key factor that connects to the plot, for example the willow tree in Harry Potter plays an important part as a transport system and guard while in the TV show Hannibal a smaller tree is used as decoration for a Serial Killer.


When developing my final idea it took time in development on what should be rocks to what I believed should stay as grass but in the end I'm really pleased on what I've done to complete it.
what I wanted to show is the loneliness of the tree in the middle of know where.


Saturday, 5 March 2016

Speed Painting


For the lesson we were tasked to speed paint an image of building in the middle of a canyon we were allowed to change the some of the image to fit the page as the original was smaller than the A4 page we were told to work on, in which I wanted to keep the original image but only change a small amount of it so it has the same atmosphere as the original image.
I started with the basic shapes and colours working my way from the back to the front then added small amounts of detail with the hard end brush then moving away with more detail with a custom brush that to me creates more of a blurring effect along with similar painting style as the image its self.


My Version:
 
We had to draw the image on an A4 page meaning that the image would be slightly stretched.


Friday, 4 March 2016

Bugs.


Mood Board:


From my mood board I designed a couple of designs where I was more interested in the praying mantis, as I was wanting to come up with a solider equivalent.


this is the sketch of the whole design in which I wanted to create armour the is apart of the bugs anatomy making it apart of the warrior class. Working in I developed a grey scale version highlighting where the light is aimed at the character.


From grey scale to quick paint on top this allows me to understand the colour scheme and can start to render the image to the details I want. the tonal difference also helps my develop my painting skills digitally.


 I had to adjust the back left leg as it didn't go proportional to the character while I was painting the character where it looks a lot better. I added a grey background to bring out the character more as well cast a shadow to develop it better.

The Final Render:

The body to be a suit of armour allowing the creature to take hard attacks.
I added a light spot to bring out of the character which defiantly improves on the image layout to create more appealing design. by adding blood details this shows how vicious this creature can be.


Final Outcome:


My thoughts:
At the beginning I really didn't know what to do so I spent time thinking over how I could create it over time I came up with different ideas where in the end I came up with this design in which I'm really pleased with as it took a long time to completely render the body scales and head.


Friday, 26 February 2016

Developing a Group Game.


We were separated into groups where we were told to design a game with has to be a 2D platform game but cant be side scrolling, which limited us on the game type and play through. The group I'm in contains 4 people James, Emma, Ben and myself which in all which I'm happy with due to having small communications which will lead to less confusion and more productivity.
We named ourselves 'Pink Flamingo' in which we came up with the firm idea of having a mix between 2D and 3D where back drops and characters will be in 2D while the platforms will be in 3D to where this will bring out more of the game to the player.
From this blog Ill be posting on what I have done in the way of game production from visuals to modeling etc.

We were all tasked on developing back grounds for our game as a result of different levels or situations that our game characters could be in so we spilt up to developing one underwater level, mountainous level, Cave level and finally grounded level. I developed the ground level where I added mountains so we could have a continuous story playing in the back drop as the player went through the game.
The Art style we chose to develop in our game is Cell Shading due to everyone being able to develop this type of style in to the game.


 This was the final idea I came up with where I would have the clouds move while in game mode. Developing this was really fun because it was the first time I used cell shading where to me I thought I did a good job on it. To help me develop and accurately position the background I was given a basic game level silhouette where placing that on the image helped me determine what places where going to be visible to the player as a I had a path following up to the mountains leading to the process of the storyline.

The Original Game Design.


I developed  block designs for the platform which had been inspired by earth of the cell shading which was all dropped due to everyone agreeing on the level being underwater.

 Under-Water Design.

When developing the layout of the underwater level I was told to quick plan out the layout for my friends to develop the layout quickly so we could all see what it would look like.


This is a small chunk of the original design in which allowed my friend to develop the layout which gave her the basic understand on what we wanted for the game.


From there I started on the texturing process in which we all agrees on where I would using Turtle to develop nice cast shadows on the rocks that I would texture.

I quickly modeled a rock and textured it to give everyone a better understanding on what the process would end up being like.

Here's some examples of that.


 What we all agreed on is that the rocks would be blue due to them being at the bottom of an ocean and that would be slightly detailed to bring them out a bit more to the player.
I added barnacles and seaweed on to see if they wanted to go with 3D on that or go 2D.
As a result I'm going to have to place these all over the platforms at the end when everyone is happy with the main texturing.
I'm going to have to model out different shapes and sizes of coral and seaweed to not unbalance the layout.

As well rocks I textured some spikes as well a ships wheel that were placed there by my friend to develop where I really like the out come of the design. I might have to rig the planet life to sway about in the game to bring it out more to the player but it depends on what my team wants as it could be a distraction from the enemies the player has to dodge.


This is a close up on the layout of the game and how the player will have to go through to collect the coins that we've placed. we may need to space out some stuff but the way it looks now I'm really happy with it so far need to add the sea bed and place it into Unity.


Next for me was the complete the shark sprits left off from James where all I had to do was clean them up and paint over them similar color and painting style as he did the first one. This was because the main artist James had gone Australia which was problematic when communication was in hand.


Developing these further was a fun and easy task to complete due to the art style needed to develop the character of the shark, in which the only troublesome part was tiding up the loose lines and complete some of the designs together.
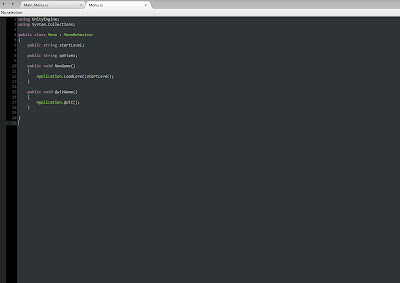
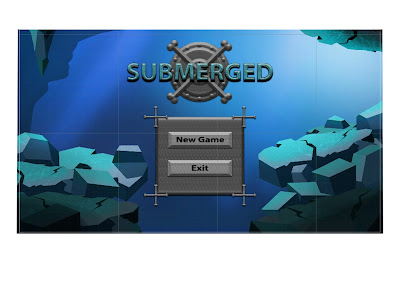
Afterwards I developed the coding for the main menu through tutorials online as well using some stuff I learnt in the lesson which allows use to click on the start and exist. when I decided to do this I knew coding wasn't my strongest suit but I tried my best and the end result I was very pleased and surprised with the working result. Ben was given the task of creating the menu layout and design where we both link together.


Final Thoughts:

 Overall the working in a group has been a really fun experience when working on a game because now I know the amount of time people can take to develop there work so next time I'll know a better way of time management for everyone to develop deadlines and sort out what's what. Even though most of my visual design work had not been used I had a good time texturing the game along with the gathering ideas of the group and coming up with the final end piece which I'm pleased with in the end, what we could have improved on was the scale of the game where we could have developed more levels which could have created a better story but apart form that I think we did well as a group for the first time.